

Home and garden projects
 Jun 24th 2019, 7:23 am
#1456
Lost in BE Cyberspace

Joined: Nov 2007
Location: Bay Area, CA
Posts: 13,103


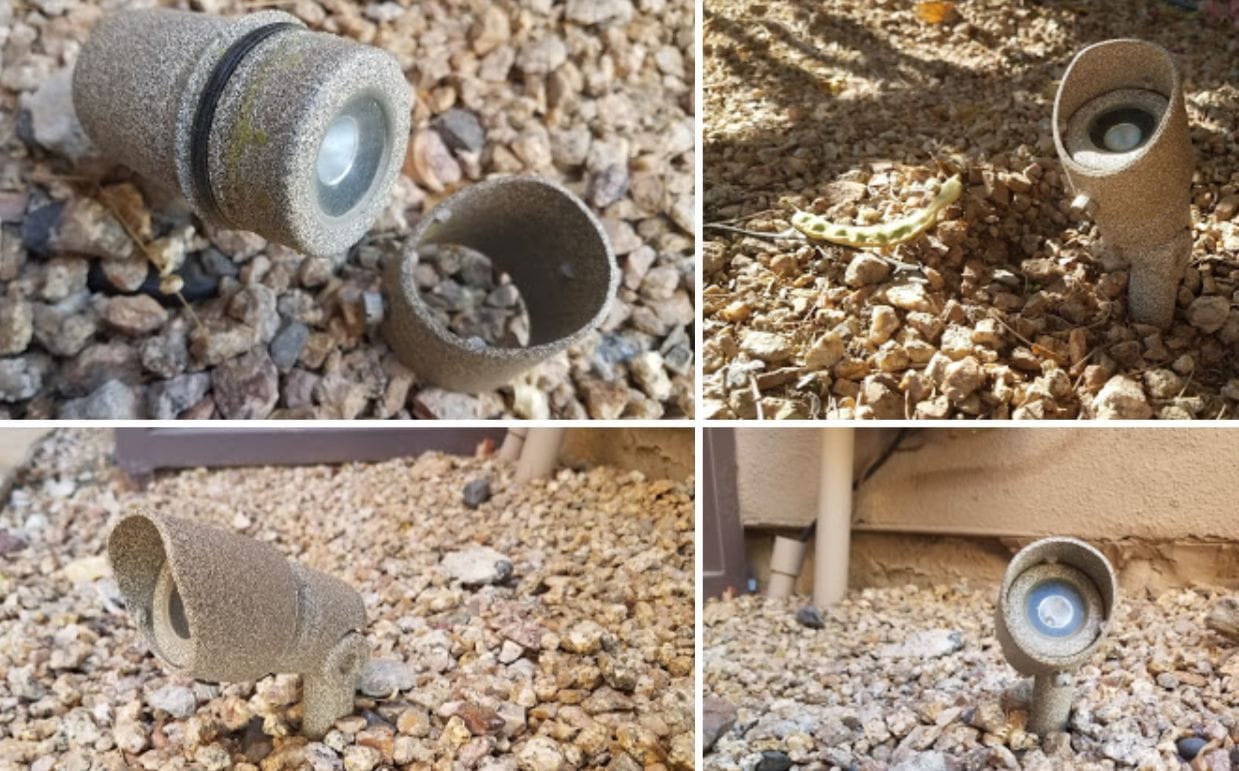
Anyone know how to remove the bulbs on these suckers? They are low voltage garden spotlights. There's a 'shroud' that is easily removed, but once removed, I have no idea what to do next. I've tried twisting, pulling, etc. Since they've been out in the sun for several Arizona Summers, they've probably welded tight! Upper left shot is with the 'shroud' removed. The black ring is a gasket that 'seals' when the shroud is in place.
 Jun 24th 2019, 11:16 am
#1457
BE Forum Addict
Joined: Apr 2014
Location: Lauren's Co. SC by way of Palmetto, Florida
Posts: 3,265
Anyone know how to remove the bulbs on these suckers? They are low voltage garden spotlights. There's a 'shroud' that is easily removed, but once removed, I have no idea what to do next. I've tried twisting, pulling, etc. Since they've been out in the sun for several Arizona Summers, they've probably welded tight! Upper left shot is with the 'shroud' removed. The black ring is a gasket that 'seals' when the shroud is in place.
A little time googling the unit might reveal bulb replacement instructions.
Jun 24th 2019, 11:26 am
#1458
Thread Starter
Joined: Dec 2001
Location: Dixie, ex UK
Posts: 52,439
Anyone know how to remove the bulbs on these suckers? They are low voltage garden spotlights. There's a 'shroud' that is easily removed, but once removed, I have no idea what to do next. I've tried twisting, pulling, etc. Since they've been out in the sun for several Arizona Summers, they've probably welded tight! Upper left shot is with the 'shroud' removed. The black ring is a gasket that 'seals' when the shroud is in place. ....
Jun 24th 2019, 11:35 am
#1459
BE Forum Addict
Joined: Mar 2015
Location: NC, USA (ex Yorkshire)
Posts: 4,375
Anyone know how to remove the bulbs on these suckers? They are low voltage garden spotlights. There's a 'shroud' that is easily removed, but once removed, I have no idea what to do next. I've tried twisting, pulling, etc. Since they've been out in the sun for several Arizona Summers, they've probably welded tight! Upper left shot is with the 'shroud' removed. The black ring is a gasket that 'seals' when the shroud is in place.
Jun 24th 2019, 11:43 am
#1460
BE Forum Addict
Joined: Apr 2014
Location: Lauren's Co. SC by way of Palmetto, Florida
Posts: 3,265
 Jun 24th 2019, 4:09 pm
#1461
Lost in BE Cyberspace
Joined: Nov 2007
Location: Bay Area, CA
Posts: 13,103
That doesn't make sense (about the gasket), the shroud is on the exterior of the unit and a rubber gasket where it is would just let water collect in between the two. Is the gasket surface mounted onto the unit, gentle investigation with a jeweller's screwdriver should tell you, I reckon it's actually a sealing gasket for the top part of the unit. Which means the part above the gasket should unscrew.
A little time googling the unit might reveal bulb replacement instructions.
A little time googling the unit might reveal bulb replacement instructions.
My google-fu on this has been unusually poor; I'm usually great at finding instructions online. For some reason, in this case, I always end up in dead ends. The vast majority of models out there (and thus, googled) seem to be cheaper plastic and/or solar.
It's typically 95 degrees outside so messing with these guys isn't the most fun (it's cooler earlier in the day but I'm not typically in 'outdoor repair' mode in the early morning
 ). My normal approach would be to dig one up, bring it inside, and give it a good once-over on the bench. But from what I understand, these things are a real pain to remove because you typically bury the wire pretty deep. Also, since they are currently working (I'm just trying to see 'what type' of bulbs are in there so I can get some spares on hand) I don't want to get too destructive on them, especially as they seem to have been custom-sprayed!
Jun 24th 2019, 4:21 pm
). My normal approach would be to dig one up, bring it inside, and give it a good once-over on the bench. But from what I understand, these things are a real pain to remove because you typically bury the wire pretty deep. Also, since they are currently working (I'm just trying to see 'what type' of bulbs are in there so I can get some spares on hand) I don't want to get too destructive on them, especially as they seem to have been custom-sprayed!
Jun 24th 2019, 4:21 pm
#1462
Thread Starter
Joined: Dec 2001
Location: Dixie, ex UK
Posts: 52,439
.... You are suggesting unscrewing the 'top part' - where the bulb is - relative to the main body (where it attaches to the bottom)? I haven't tried a strap wrench (don't have one) but if I KNEW the top would unscrew, I would buy one and give it a go. Right now, I'm thinking there are two choices - unscrew or, pull-off. If it's a pull-off and I try hard to rotate, it may break. Conversely, if I figure a way to grip it and pull hard, but it's meant to screw off, I may break it also. These guys are a nice, solid-feeling aluminum so I probably can't do too much damage! ....
To your point about push fit v screw fit, I think that pulling on a screw fitting would be unlikely to work, but has the potential to cause damage, but using a screwing action on a push fitting is not only unlikely to cause damage, but in fact I would use a rotating action to try to loosen it ..... obviously counterclockwise* if I wasn't certain whether it was a screw or push fitting, before switching to a pulling action once the seal was loosened.
BTW I find that my two strap wrenches are among the tools I reach for most often - they are very useful in a number of situations to loosed or undo things that need a rotating action, even though I have a history of opening screw top bottles that nobody else can undo, a skill that I still maintain. On of the great things about strap wrenches is that they are soft and flexible so don't risk causing the sort of damage that the jaws of pliers or other metal gripping tools can easily cause.
* This approach won't work with propane gas fittings or the nylon lock-nut that holds toilet flush lever to the tank.

Last edited by Pulaski; Jun 24th 2019 at 4:23 pm.
Jun 24th 2019, 5:35 pm
#1463
Lost in BE Cyberspace
Joined: Nov 2007
Location: Bay Area, CA
Posts: 13,103
Firstly, I don't think you are likely to damage the sort of fitting you described, "solid feeling aluminum" using hand tools, especially not a strap wrench.
To your point about push fit v screw fit, I think that pulling on a screw fitting would be unlikely to work, but has the potential to cause damage, but using a screwing action on a push fitting is not only unlikely to cause damage, but in fact I would use a rotating action to try to loosen it ..... obviously counterclockwise* if I wasn't certain whether it was a screw or push fitting, before switching to a pulling action once the seal was loosened.
BTW I find that my two strap wrenches are among the tools I reach for most often - they are very useful in a number of situations to loosed or undo things that need a rotating action, even though I have a history of opening screw top bottles that nobody else can undo, a skill that I still maintain. On of the great things about strap wrenches is that they are soft and flexible so don't risk causing the sort of damage that the jaws of pliers or other metal gripping tools can easily cause.
* This approach won't work with propane gas fittings or the nylon lock-nut that holds toilet flush lever to the tank.
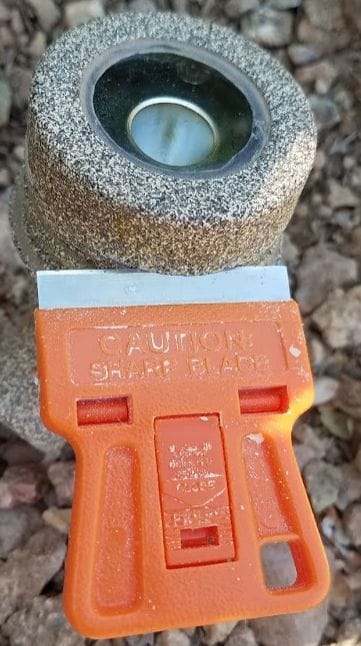
. The top appears to be white plastic, while the base is aluminum. The gasket, now removed, was in the 2nd recess from the left, near the pronounced ridge ... and as one poster observed, this seems utterly pointless! Maybe more will be revealed tomorrow And PS - I love these blades / holders! Narrower than a 'box cutter' blade. 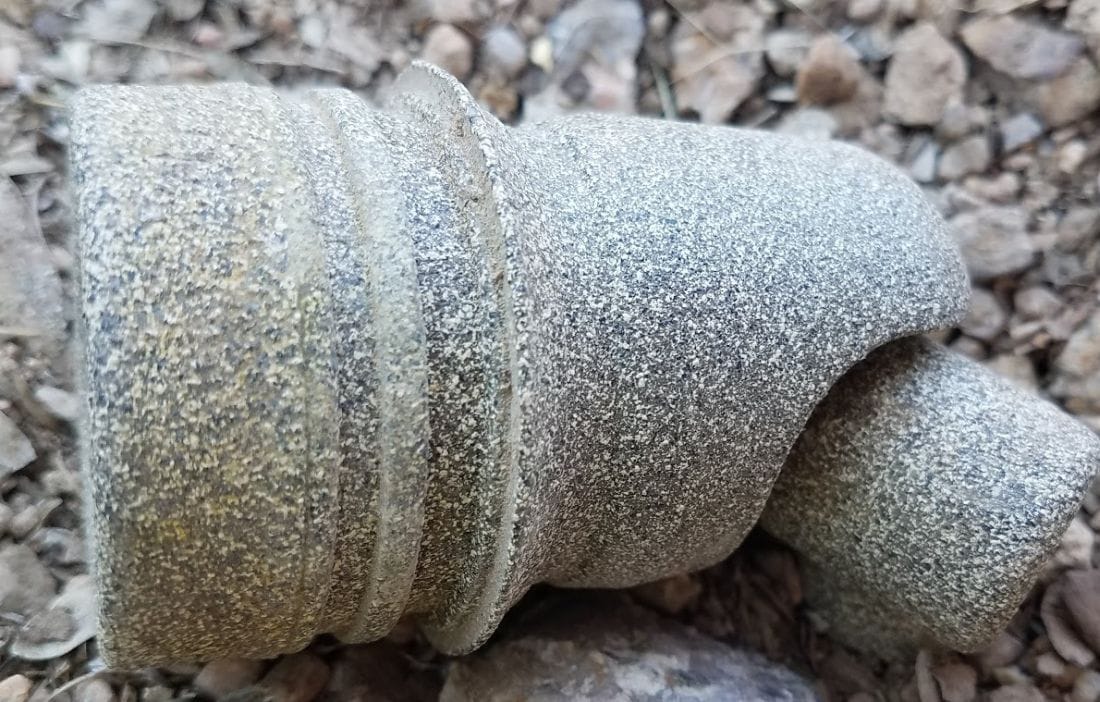
This all started, by the way, by me not knowing if the lamps were old-style halogens or modern LEDs. Since I couldn't get at the bulbs, I finally determined they were LEDs by measuring the power consumed by the entire string of 10 lamps with my 'kill-a-watt' meter - total of 30 watts for 10 lamps, so these are clearly LEDs! Now that I know that, I can replace the monster 300 Watt low-voltage transformer (that buzzes and whirs, as it has a clock built in) with a low-power box and then use my home automation to control them rather than the old style mechanical timer. So I really don't need to get the tops off these guys as the LEDs will probably outlive me, but it just bugged me that I couldn't figure it out!
Jun 24th 2019, 5:42 pm
#1464
Thread Starter
Joined: Dec 2001
Location: Dixie, ex UK
Posts: 52,439
You can tell that easily just be touching them after they have been on for a few minutes - LEDs are pretty much cold to the touch, whereas a halogen light is seriously hot, not just warm, but hot!
Jun 24th 2019, 9:15 pm
#1465
Lost in BE Cyberspace
Joined: Nov 2007
Location: Bay Area, CA
Posts: 13,103
But when it's 100 degrees out, touching metal things can feel hot regardless! So I didn't want to rule out halogen still. I've systematically removed all my halogens with LEDs throughout the house - 30+ so far ... so now I'm using less electricity and generating less heat so I'm happy. I have a lifetime's supply of spare MR16 GU10 halogens if anyone wants them
 Jul 15th 2019, 3:50 pm
#1467
BE Forum Addict
Joined: Jun 2015
Location: Near Lynchburg Tennessee, home of Jack Daniels
Posts: 1,381
Jul 15th 2019, 4:51 pm
#1469
Joined: Apr 2012
Location: CT
Posts: 33,489
Buster, the big blonde guy is my wifes horse... Ruby, the darker one is a rescue we took recently to keep Buster company.
